Speedy & Stylish Blow Dry Your Hair Tutorial
What is the first thing you do when you wake up in the morning? Is it to hop into a hot shower and get ready for your day ahead? Or, maybe some of you are like me and go straight to blow-drying your hair. I know that’s right. But, it can be such a hassle to wash and style my locks every morning. That’s why I’ve created this easy-to-follow tutorial on how to dry your hair quickly with minimal fuss. Follow these few steps below, and I promise it’ll change your mornings forever.
We all know that blow-drying your hair is not an easy task. It can take a lot of time, and many people are scared even to try. Luckily for you, this blog post will give you step-by-step instructions on how to dry your hair like a pro! So follow these steps carefully, and soon enough, your hair will be looking great!
Blow Dry Your Hair Tutorial:
 Step 1 – Prep the scalp as well as the length of the hair with shampoo.
- Step 2 – Apply thermal protection spray before using heat styling tools on wet hair.
- Step 3 – Use a towel or t-shirt to absorb any excess water from wet locks, so they are damp but not soaked. Spray them lightly with hairspray if desired (always use one formulated for heat).
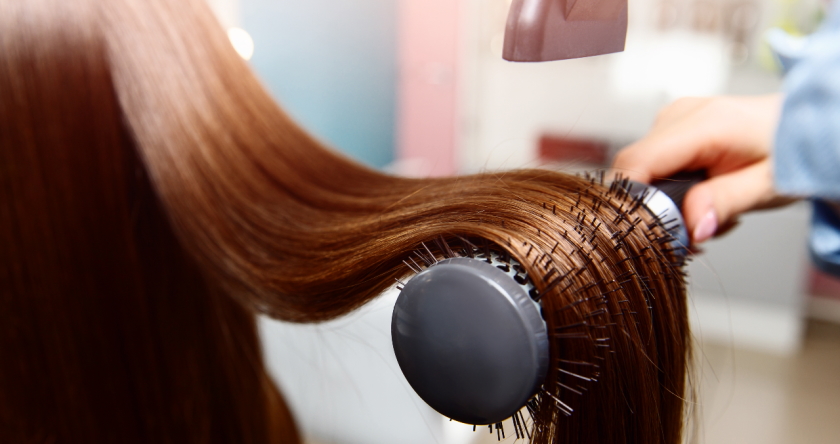
- Step 4 – Divide hair into sections and then twist it.
- Step 5 – Use a round brush that has bristles of different lengths so you can get all types of curls in your hair. Coat the brush with products like mousse or gel and start at the roots of your head, brushing toward the ends as you go along while holding sections up and away from one another to create volume. Once it’s dry, use a light-hold hairspray on top for added texture.
Is blowing drying your hair bad?
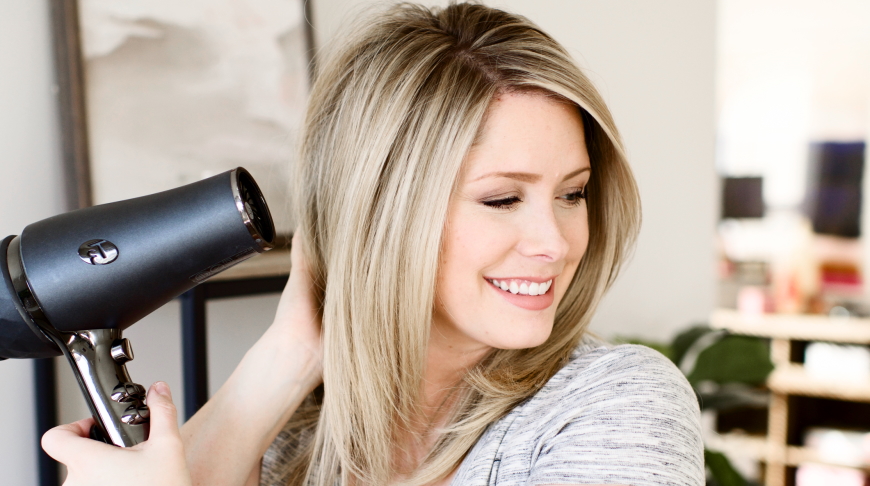
Drying your hair with a blow dryer has some pros and cons. Blow drying can make your hair more manageable, but it can also cause split ends or damage the cuticle of your hair, which will leave you with curly locks that are difficult to style. The best way to avoid this problem is to use a diffuser attachment on your blow dryer while you’re drying. This will help reduce heat exposure which in turn reduces the chance for damage. It’s essential to find what works best for you as every person’s hair reacts differently.
Blow drying techniques
How many times have you tried to dry your hair, and it just didn’t turn out the way you wanted? Maybe it took too long, or maybe it didn’t look as good as you imagined. You’re not alone. Blow drying is one of those things that can be tricky if you don’t know what you’re doing. That’s why we’ve put together this blog post for all hair types: short, medium, curly – whatever your style may be, we hope these tips will help make blow-drying a little easier on everyone.
Do you ever wonder if there’s a technique for blowing your hair dry? I had no idea, so I did some research. It turns out there are many different techniques and tips that can help you get the perfect blowout! So let me share with you my favorite three tips for getting gorgeous locks:
- Use a volumizing mousse before drying to add volume and bounce.
- Blow-dry your hair upside down after it is about 80% dry (this helps give body).
- Pull pieces of hair up in sections using a round brush or comb as you go.